


In my previous article, I covered how to Build your first chrome extension in detail.
Now publish that extension to the chrome web store so that other users can download and use the service that we have developed in the previous article.
Google made the process of publishing extension very easy by providing a developer dashboard.👨🏻💻
Let’s jump into the actual steps.🧐
To publish our item to the Chrome Web Store, we will follow these steps:
- Create your extension’s zip file
- Create a developer account and Activate an account
- Upload your package
- Add details about your extension
- Add assets for your listing
- Submit your item for publishing
Stick together and let’s get into detail about each step.🤝🏻
Create our extension’s zip file
To publish our extension we need to create a zip file that includes all the necessary files.
📝Note:- manifest.json must be included in the package at the root level, and the manifest file must contain the following fields.
- “Name” — Used to represent the name of the extension on the Web Store and Chrome
- “Version” — This represents the version of the extension (incrementing value)
- “Icon” — This represents the extension’s display icon on Web Store and Chrome
Refer to the following file structure for other required files.
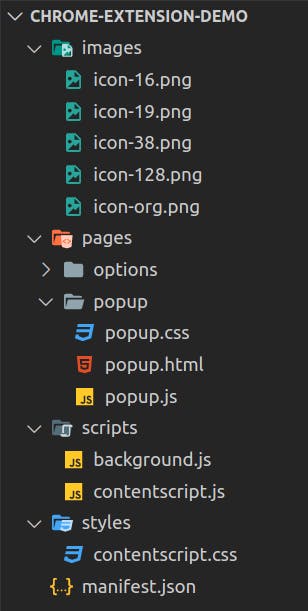
File Structure
To upload a package created in the previous step you need a developer account, so let’s create one.✏️
Create a developer account and Activate an account
Before we publish our Chrome extension to the web store, we need to register as a Chrome Web Store developer.
On your developer account, the email address field is required. You cannot publish items if this field is blank.
To register ourselves as a developer, we need to visit the developer console. Then we need to agree to the Developer’s agreement and policies.
As you can see in the following image, we need to pay $5💰 as a lifetime developer account fee (to publish our extension this is required).

Register as developer
Once we are done with activating our account now we can upload the package to the dashboard that we created in the first step.
Let’s Upload our package
To upload our package we need to create a new item on the dashboard.

Add new item
Click the New Item button which will open one small popup, use this popup to upload a zip file that we have created. We can upload our item multiple times before submitting it for review.
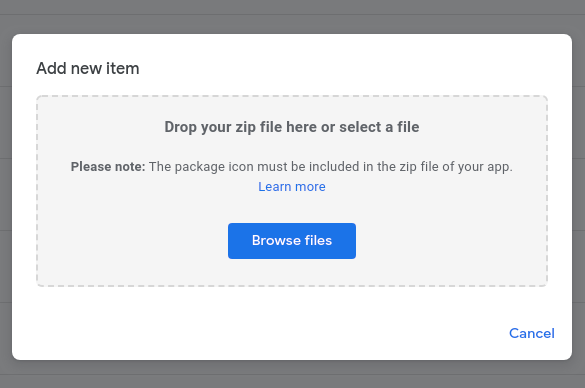
Upload package
You cannot have more than 20 extensions published on the Chrome Web Store. There is no such limit on the number of themes.
⚠️ Be aware that once you add an extension to your Developer Dashboard you cannot delete it. As long as it is not published, it will not count towards your extension limit.
Let’s add details about our extension
After a successful package upload, we will be redirected to the page where we need to fill all the necessary additional details about our chrome extension.
First, we will select “Store Listing” options from the left menu,
- Let’s add a description to our item in the description section.
- Then select the category for your extension (this is to list our extension on the web-store under the selected category).
- Select the preferred language for our extension.
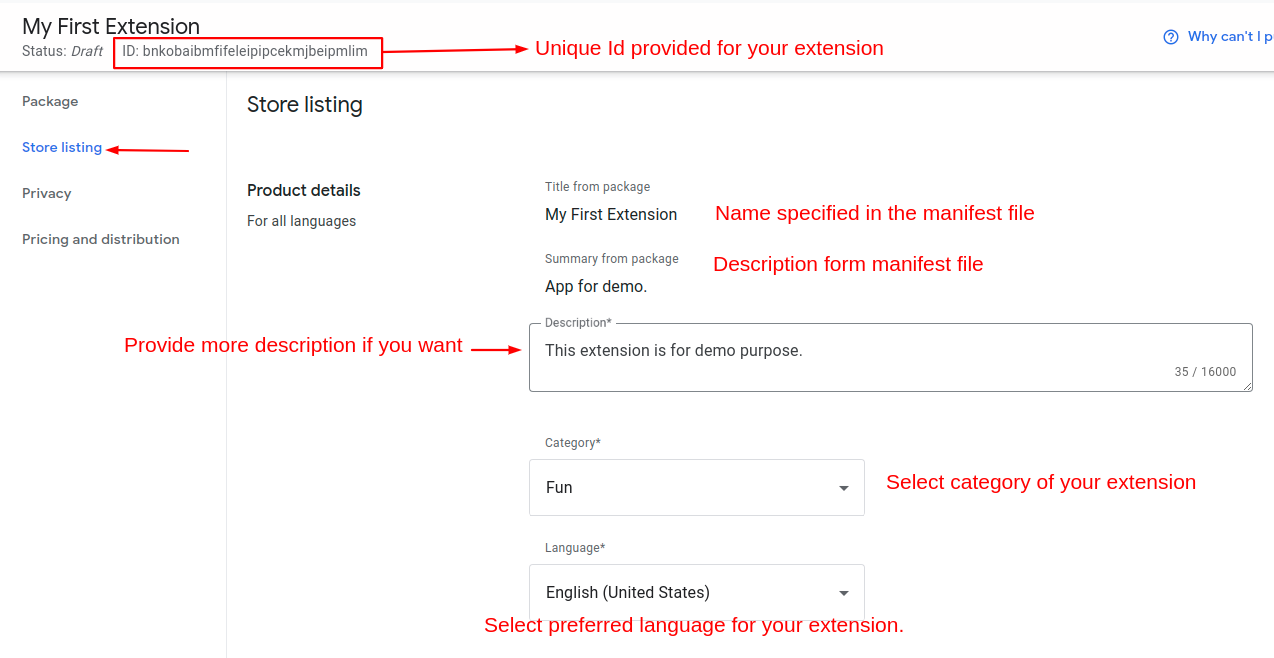
Item listing details
If you are using any special permissions in your manifest file then you will need to add some description about that permission in the privacy section.
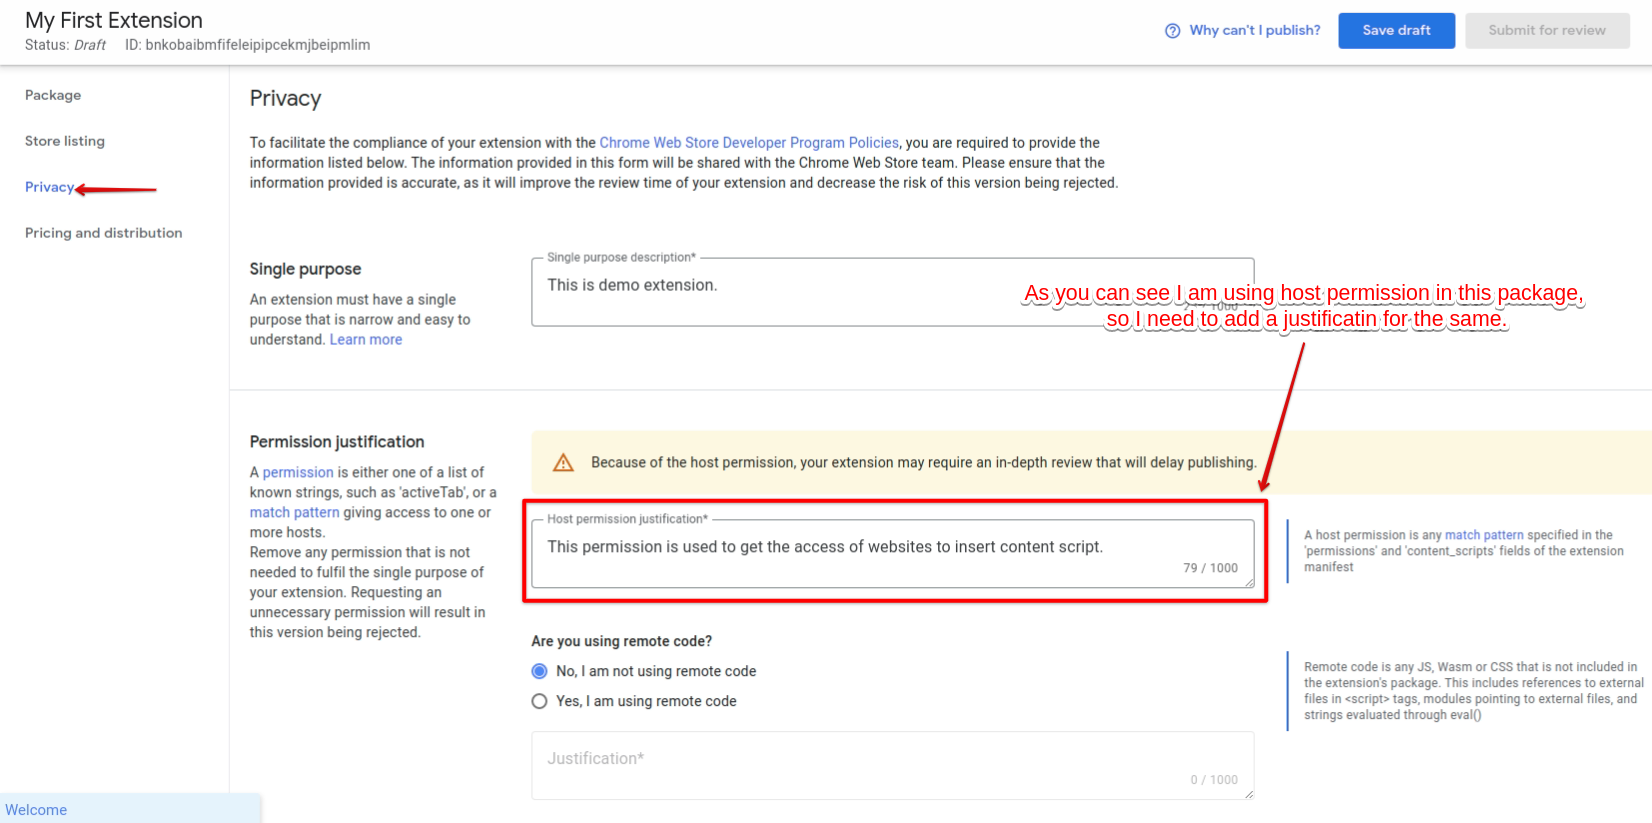
Item privacy details
Let’s add assets for our listing
Once we are done with adding details, we need to add some assets for our listing, Assets are nothing but the showcase or a quick view of our extension.
We can add a youtube video or any images of a specific size. We need to add at least one image as assets to publish our extension.
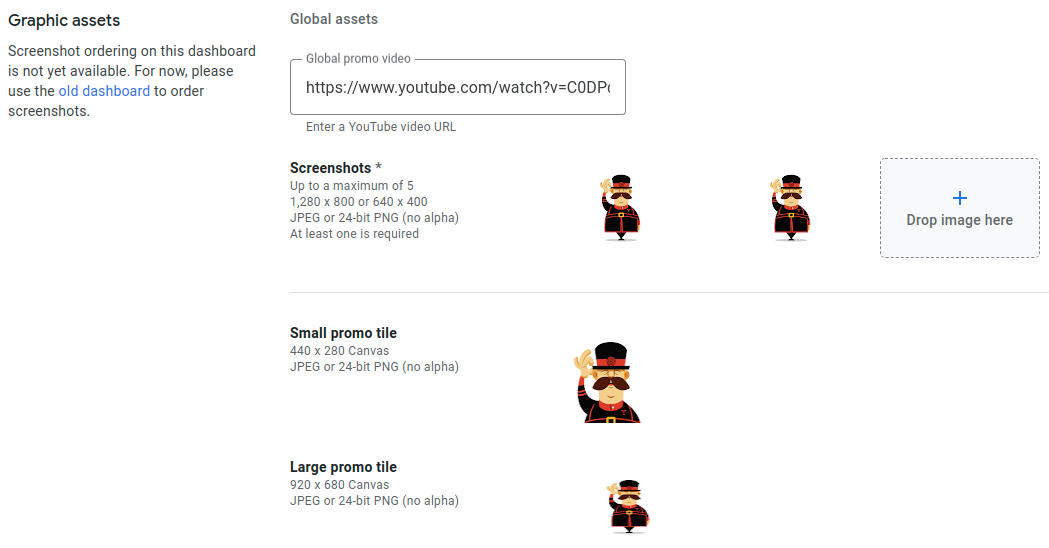
Assets screen
Other details can be added but I am not going to cover everything in this article as this is our first extension and we don’t need them here.
Submit our item for publishing📢
And now everything is set to publish our first extension.🥳 After adding all the details and necessary information save the changes.
If nothing is remaining from compulsory fields, then the submit for review button will get enabled.
We can click the Submit for Review button and submit our first chrome extension for review.
The following dialog appears, letting us confirm that we want to submit the item for review.
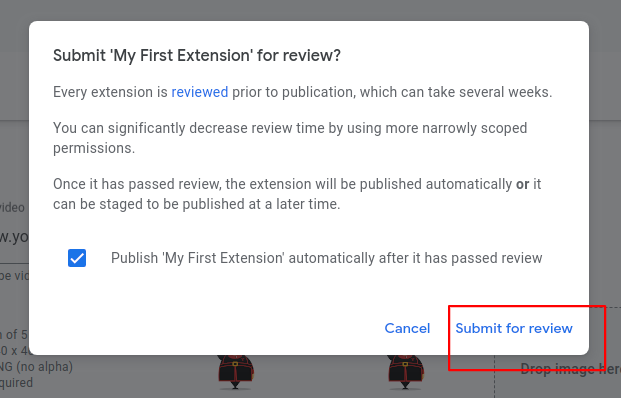
Submit for review popup
The confirmation dialog is shown above also lets us control the timing of our item’s publishing. If we uncheck the checkbox, our item will not be published immediately after its review is complete. Instead, we’ll be able to manually publish it whenever we want once the review is complete.
So let’s click the last button (Submit for review) to put a final step towards publishing the extension.
After we submit the item for review, it will undergo a review process. The time for this review depends on the nature of our item, once that is done our extension will be live on Chrome Web Store.
Bingo!🤩 We just published our first chrome extension.
In the upcoming article, I’ll explain how to upload/update our extension using an automated script.
Stay connected!
Hope you liked it.
Thanks for your time.
Hope you like it, if yes **like & share.**
Happy coding….